Monday, October 3, 2011

Gluten Free Autumn Honey Cake

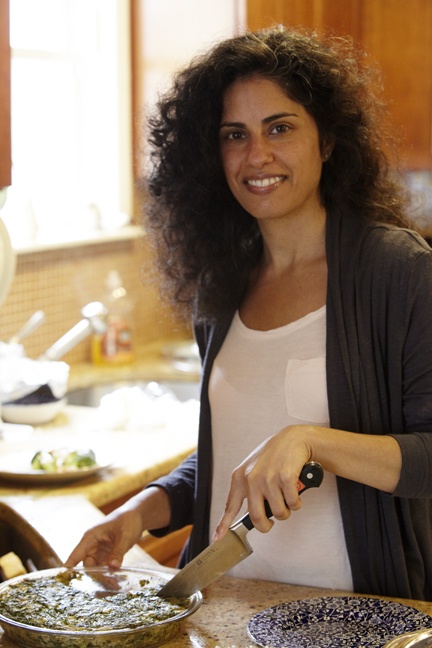
This past week was the beginning of the Jewish New Year, known as Rosh Hashana. The holiday signifies the creation of the human world some 5772 years ago. 


A traditional way to bring on the New Year is to celebrate with sweet edible things on the table, to symbolically express their wishes for a Sweet New Year. It's still not too late to make a honey cake for the New Year, since we are supposed to be eating sweet foods until Yom Kippur- this coming Friday. This recipe for Honey cake has been passed down through the generations with tones of cinnamon, allspice and clove, which are very grounding and homey during the New Year, when family gets together for the festival.

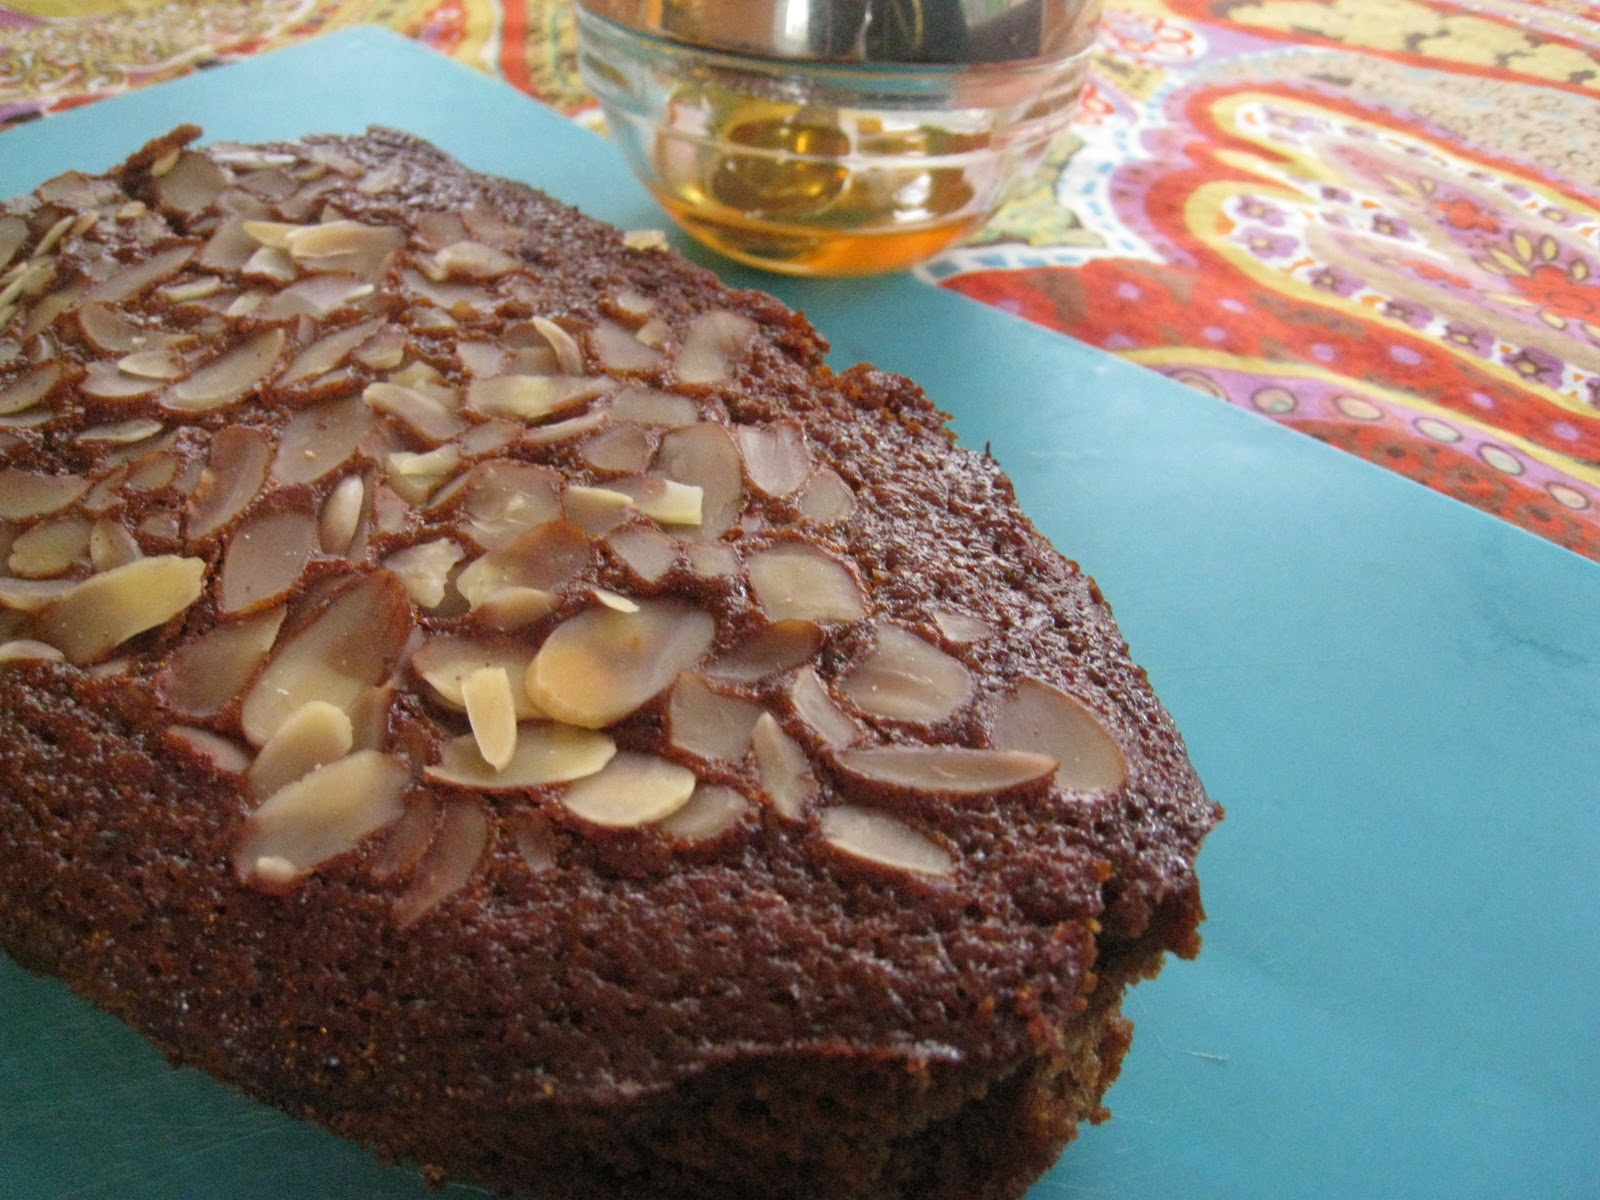
This honey cake is moist, soft and plush with a little crisp edge topped with almond slivers for an extra crunch. Another bonus with this cake is that it can be made up to a week in advance as it preserves really well. In fact, honey is a preserving agent and allows the spices to fully develop, so actually tastes better with time.


I find it so interesting that so many Jewish communities around the world have created their own signature sweet dishes for the Sweet New year. Among Askenazi Jews there is the custom to make a sweet noodle kugel and a sweet stuffed cabbage- just to name a few. So what are your traditional dishes that you make on Rosh Hashana?

Serves 2 (9-inch) loaf pans

Ingredients


3 ½ cups All-Purpose Gluten Free Flour
4 teaspoons ground cinnamon
1-teaspoon baking powder
1-teaspoon baking soda
½ teaspoon salt
½ teaspoon ground allspice
½ teaspoon ground cloves
4 eggs
½ cup firmly packed brown sugar
1-cup vegetable oil
1-cup honey
1-cup strong brewed coffee
1 cup orange juice
¼ cup lemon juice
1-teaspoon vanilla extract
Zest of one lemon
1-cup raisins
½ cup almonds, slivered
¼ cup almonds, slivered for topping

               1    Preheat oven to 350°F
               2    In a medium size bowl, sift together the flour, cinnamon, baking powder, baking soda, salt, allspice and clove.
               3    In a separate large bowl with an electric mixer, beat the eggs, gradually adding the sugar. Beat until thick and light in color, about 5 minutes. Beat in the oil, honey, coffee, orange juice, lemon juice, vanilla extract and lemon zest. The batter will be light and fluffy. Stir flour mixture slowly into batter. Fold in raisins and then mix in ½ cup almonds.
       4       4 Oil the two loaf pans and line bottom with waxed paper. Oil again and fill each pan with batter up to one inch from the top. Bake for 45 minutes or until toothpick inserted comes out clean. Let cool 10 minutes and remove from pan.
                                                                                                                                                                                                                                                                                                                                                                                                                                                                                                                                                                                                                                                                                                                                                                                                                                                                                                     
      4   

Monday, September 19, 2011

Korean Scallion Pancakes ~ Pa Jun

Photo by Jennifer Jagusak
Korea is not officially part of the Silk Road, but East-West trade extended there, and as a result, Korea’s cuisine influenced and was influenced by the travelers on the Silk Road. Pa Jun is a Korean pancake that can be served as a snack, appetizer, or side dish and is commonly found in Korean street markets. It’s a crispy scallion pancake that is chewy and moist on the inside, with fillings of carrots, mung beans and seafood. Today you can find it made in many different variations in most Korean restaurants, where it is served as a starter with a dipping sauce. Though Pa Jun is typically made with a pancake like batter, my Pa Jun is gluten free, made with rice flour. It’s speckled with zucchini and carrots and served with a ginger-soy dipping sauce--all together, a sure recipe for no leftovers. These pancakes can be eaten alone without the dipping sauce, just make sure to add some salt to taste to the batter.

Serves 8 to 10

Ingredients

Pancakes
1/4 cup rice flour
2 eggs, lightly beaten
2 tablespoons vegetable oil
1/4 cup water
5 scallions, green parts only, cut into 3-inch lengths on the bias
1 medium carrot, grated
1 small zucchini, trimmed and grated

Dipping Sauce
3 tablespoons gluten-free or regular soy sauce
2 tablespoons water
1 tablespoon rice vinegar
1 teaspoon minced fresh ginger
1 teaspoon red pepper flakes
1 teaspoon granulated sugar


Directions
       1  In a medium-sized bowl, whisk the flour, eggs and 1 tablespoon of the oil with the water until a smooth batter is formed. Stir in the scallions, carrot, and zucchini and mix to combine. Chill in the refrigerator for 30 minutes to allow the rice flour to swell.
                       2   Coat the bottom of an 8-inch nonstick skillet with the remaining oil. Set over medium heat. When the pan is hot, ladle in about a quarter of the batter and spread it out into a circle, tilting the pan slightly to spread it evenly. Cook for about 8 minutes, or until the bottom is browned and you see holes in the pancake. With a spatula, flip the pancake and press firmly on the top to squeeze out any remaining batter that is not cooked.
                      3      Cook for another 8 minutes, or until the batter is cooked thoroughly and the pancake is browned. Repeat with the remaining batter.
                      4      In a small bowl, whisk together the soy sauce, water, vinegar, ginger, red pepper flakes and sugar.
           5      Cut the pancakes into small triangles and serve with the dipping sauce.

Tuesday, September 6, 2011

Purple Cabbage and Clementine Salad


Purple Cabbage salad courtesy of Devlyn's Photostream (www.SomethingClever.net)
Just as the waning days of summer are winding down, my CSA delivered a cute little red cabbage. Raw and shredded and dressed with sweet clementines and currants makes for a perfect summer salad that is perfect for large crowds.   
The peppy dressing does not cover up the beautiful bold colors of this salad. If you have a food processor with a shredding and slicing disc, this really couldn’t be easier to make. Without it it’s pretty east too, so don’t worry - as a sharp knife will suffice.
A colorful, crunchy purple cabbage salad that is accented with cranberries (or currants of your choice) and clementines, both of which are loaded with the disease-fighting antioxidants. It has a zesty, fresh personality and the citrusy dressing is quite a peppy blend, as well. This is one of my special occasion salads for large crowds; they always ask for more. 


Serves 8
Ingredients

Salad
3 clementines
1 medium purple cabbage, shredded (about 6 cups) or 2 (16 ounce) package shredded purple cabbage
cup pine nuts
2 carrots, shredded
1 to 2 handfuls of dried cranberries, or to taste
cup chopped scallions

Clementine Dressing
4 tablespoons brown sugar
½ cup vegetable oil
4 tablespoons red wine vinegar
Reserved clementine juice
2 cloves garlic, crushed
¼ teaspoon sea salt
½ teaspoon freshly ground black pepper


Instructions

   1   Working over a bowl, peel the clementines, separate the segments and remove any white pith. Reserve any juice that falls into the bowl. Place the clementine segments, cabbage, pine nuts, carrots, cranberries, and scallions in a large salad bowl. Set aside.
   2   To make the dressing: in a cruet or jar with a lid, mix the brown sugar, oil, vinegar, juice, crushed garlic, salt and pepper. Close tightly and shake until all the ingredients are thoroughly combined.
3   Pour the dressing over the salad, seal and toss to coat. Refrigerate For up to 1 hour before serving.


Tuesday, August 16, 2011

Introducing my Food Photographer - Jennifer Jagusak

A few months ago I took a class at the Institute of Culinary Education in NYC for a class on Food Styling and Photography. It was a weekend intensive course on the art of styling food with tips and tricks on how to make your food look mouth watering- when really, if you saw how food was made to look good, you would have to throw it away, unfortunately.


I met the creme de le creme of food photography Jamie Tiampo and James Peterson along with food stylist Laurie Knoop. With my Cannon digital Elph I muddled along to take quality photographs - well I tried to at least. Truth is after the class I am still struggling to take nice photos. Main problem is my digital Elph- I need to upgrade to a DSLR camera, the other issue is capturing natural lighting, and lastly props.


Since that weekend at ICE was so intense, I became friendly with the food stylist Laurie, who kindly suggested that I get a professional food photographer to take my photos for my cookbook. She probably saw there is little hope in my photo taking skills. She was fascinated by the concept of my cookbook- Silk Road Vegetarian Cooking made Modern.


Most of the recipes in my upcoming cookbook need to be photographed because very little is written- in the form of recipes about Central Asian Rice dishes. The rice dishes require prep time and planning and quite a number of steps, which is where a picture can help the home cook get an idea of what the end result should look like. Very important in a cookbook.

Asian Slaw on countertop
Laurie heard of a woman, Jennifer Jagusak who was looking to break into Food Photography. Lucky for me.... really lucky for me Jennifer lives in the next town over from me - Port Washington. I called her and she was enthusiastic to be a part of my cookbook on Vegetarian Silk Road Cooking. She never really heard much on that cuisine - let alone tasted it, so felt an interest to not only shoot the photos, but also learn about Silk Road cuisine.

Arranging a Beet Salad
A couple of months after that class at ICE, Jennifer came to my home on a Sunday morning with all her beautiful props that were perfect for the shoot. It was an assembly of bright vibrant color cloths, interesting shapes of bowls and plates all with a Asian vibe. It was perfect. Jennifer really understood what I was trying to get across. She also made sure to take photos of the inside of my home, which is an eclectic mix of African and Asian art objects and furniture.

Me and Flynn in my backyard. I know.... we both have so much hair, you can't even see us

On that Sunday, I prepared about 15 different dishes - focusing on the Appetizers and Salads. It was not an easy task at all! Although very exciting to see how Jennifer skillfully amped up the foods into cookbook quality photos.


Spinach Quiche

The photos presented here are the out takes and we don't intend to publish them in the cookbook. Wait till you see the mouth watering photos that will go into the cookbook. Stay tuned....

That's me

You will also find the link to the photos that we - the students at ICE took for our photography class. Take a look at the lineup of talent in my class.


Monday, August 8, 2011

Quinoa and Broccoli with Japanese Carrot-Ginger Dressing

I was in an epicurean culture shock when I first arrived in Tokyo at the age of nine to visit my grandfather, who had lived there for some twenty years as a rare pearl dealer. My parents wanted to expose me to Japanese culture, which included sushi, but I was not a fan of raw fish wrapped in lettuce of the ocean. I still remember looking down the street at rows and rows of restaurants in the Roppongi neighborhood, the epicenter of Tokyo nightlife, and spying not one Western eatery. Finally I succumbed to a Japanese restaurant and we ordered a carrot ginger salad. That was my first introduction to this delightful Japanese condiment. Years later, I discovered from Good Housekeeping magazine that this dressing, typically served on lettuce greens, fuses well with the South America grain, quinoa.

To save on time and pots, you can steam the broccoli in a steamer basket on top of the bubbling quinoa in a rice cooker. While you wait for those two to cook, a food processor or blender makes quick work for the warm orange colored dressing that clings so well to the quinoa. The sharp flavor of the ginger is rounded out by the toasted nutty sesame oil and soy sauce, and mellowed by the sweet ground carrot. Serve warm or at room temperature.

Serves 6


Ingredients

1 1/2 cups quinoa
3 cups water
½ teaspoon kosher salt
1 large head broccoli, cut into florets
2 carrots, chopped 
2 inch piece fresh ginger, peeled and cut into chunks
3-tablespoons vegetable oil
3-tablespoons rice vinegar
4-teaspoons gluten-free or regular soy sauce
3-teaspoons sesame oil

Directions
      1      Put the quinoa into a sieve and rinse it under cold running water. In a saucepan, combine the quinoa, 3 cups water, and 1/2 teaspoon salt and heat to boiling over high heat. Reduce the heat to low; cover, and simmer for 20 minutes, or until the water is absorbed. Transfer the quinoa to a large bowl.
      2      Meanwhile, fill a medium-sized saucepan with enough water to come 2 inches from the bottom and set over medium-high heat.  Place the broccoli in a steamer basket, and when the water boils, set the steamer on top of the saucepan. Alternatively, place the broccoli directly into the nearly boiling water. Cook, covered, until the broccoli turns bright green and is crisp-tender. Add the broccoli to the quinoa.
      3      In a food processor, combine the carrot, ginger, oil, vinegar, soy sauce and sesame oil and process until puréed. Add to the quinoa and broccoli and toss to combine. Serve warm or at room temperature.

Cook’s Note - Another alternative is to combine the quinoa with water and salt in a rice cooker and use the steam basket that comes with the rice cooker for the broccoli.


Tuesday, July 19, 2011

Kohlrabi Salad in Fennel Seed dressing


What is that weird looking celery green vegetable that is the size of an apple- even crispy like an apple, but has stems growing from it? The Kohlrabi. The most coveted part of kohlrabi is the bulb-shaped stem, which is usually peeled, then sliced or cubed before being eaten raw or cooked. It is one of the most widely eaten vegetable in Kashmir, yet not known well in the West at all. In fact, in Asia it's eaten raw as a finger food, much in the same way that we eat baby carrots as an Hor D'Ouvres. I think the reason why it's not as well known here in the West is because it's an acquired taste. Kohlrabi has the taste of a cross between an asparagus and a broccoli stem. Sounds appetizing.... hmmm.
Well, I was with you on that up until recently.
Growing up in my Afghani home, kohlrabi was typically served peeled and cut up as Hor D'ourves and served as an aperitif before the main meal. As a child, I could not appreciate this foreign root vegetable that I could not pronounce.  Belonging to the CSA where there is a weekly surprise of vegetables, sometimes unfavorable, I received kohlrabi. I loved the challenge of creating a dish with a vegetable that I had an aversion to as a child. When I stumbled upon this recipe from Ivy Manning's Farm to Table Cookbook, I knew that this salad was going to change my view of this turnip. Kohlrabi, carrots and fennel are fused into a subtle salad that is refreshing and clean. The fennel seed and the sesame oil combine to mysterious effect, as you crunch your way through the salad. There's something about the dressing and the sweet crunchy vegetable batons that combine with the floral heat, creating a fanciful tingle on the tongue.
Serves 4
Ingredients
2 medium red or green kohlrabi bulbs

1 large carrot peeled

1 teaspoon fennel seed or 1/2 teaspoon ground fennel

2 tablespoons rice wine vinegar

2 tablespoons olive oil

1 teaspoon toasted sesame oil


1/2 teaspoon kosher salt, or more to taste

1/2 teaspoon freshly ground black pepper

1 small garlic clove, pressed
1 California green chili (long green pepper) minced


Directions

      1      Peel the tough outer skin and cut the stems from the kohlrabi. Julienne the kohlrabi with a mandolin or in a food processor fitted with a julienned blade (you will have about 4 cups), and then julienne the carrot.
      2      If using whole fennel seed, toast the fennel seeds in a small dry sauté pan over medium heat until they begin to brown slightly and smell toasty. Transfer them to a mortar and pestle or spice grinder, and grind them into a coarse powder.
      3      In a small bowl, whisk the ground fennel seed, vinegar, olive oil, sesame oil, salt, pepper, garlic and chili. Pour over the vegetables and toss to coat. 


Monday, July 11, 2011

Zucchini & Mushroom Salad in Chili Lime Dressing

Just came back from Europe- was in Amsterdam and Berlin. Amsterdam is a beautiful city with over 100 canals where homes- as old as from the 1600's were built on the canals. Amsterdam was not always a city of canals- it's reclaimed land from the ocean. To keep up with the growing demand of the ever growing population during the Golden Ages, Amsterdam had to build out.

Berlin..... is another story. Trying to encapsulate the feeling of Berlin is a bit difficult. It's not a particularly beautiful city- there is a certain dreary feeling. After WW II, the U.S. flattened most of the city. So what remains are some historical places- in German called PLATZ. The University where Albert Einstein went to college is still a sought after university. All the statues are still intact. Sadly, the largest synagogue in Germany was burnt down, but what does remain is the facade and inside in a museum of what was. Most of the city has been built up and parts of it look like a throw back to the 1950's.

So I came home this past Friday which is after my CSA delivery on Wednesday. When ever I go away, I make sure to arrange for my share to be donated. As I came home to no food from my summer crop, I had to scrape a meal together with the little food I had left in the fridge. The next day, I ran into a friend of mine- Phil who lives in Kings Point and has a large lush property with tennis courts and along the tennis courts he grows zucchini. If you have ever grown zucchini then you know when it comes in- it really come in. The garden gets taken over by these large yellow flowers that look like they have given birth to zucchinis. So Phil generously offered that I come by and do my shopping. That's where this salad comes in....

This summer salad harmonizes sour and spicy flavors into a burst of freshness. The cilantro is aromatic and brightens the mild flavor of zucchini and mushrooms. An ideal and easy dish to prepare when there is a plethora of zucchini popping up in your local market, which is just about to come. Any leftovers can be refrigerated and enjoyed over the course of a day or two. This recipe comes from one of my most favorite vegetarian cookbooks, 15- Minute Vegetarian by Sasann Geiskpf-Hadler and Mindy Toomay.

Serves 6

INGREDIENTS

3 zucchinis
8 ounces button mushrooms, sliced
½ red onion, finely chopped
¼ cup cilantro, finely chopped

Dressing
¼ cup freshly squeezed limes (3 limes)
2 tablespoons olive oil
2 teaspoons chili powder
1 teaspoon crushed garlic
½ teaspoon ground cumin
½ teaspoon salt
Ground Pepper to taste

Instructions

1 Slice each zucchini in half lengthwise, then cut the halves crosswise into ½ inch slices.
2 Place a steamer basket into a large saucepan. Fill the pot with enough water so that is just barely reaches the bottom of the steamer basket. Bring to boil over medium high heat. Once boiling, add zucchini and cover. Steam for 5 minutes or until tender crisp.
3 Meanwhile, in a small bowl, whisk together the lime juice, olive oil, chili powder, garlic, cumin, salt and pepper until emulsified.
4 In a medium bowl, place the mushrooms, zucchini, and onion, and toss. Drizzle the dressing over the vegetables, sprinkle the cilantro and toss to combine.


Related Posts Plugin for WordPress, Blogger...