Monday, December 20, 2010

Vegetarian Moussaka

In the Mediterranean there are endless versions of moussaka, but the basic principle is layered vegetables alternating with layers of minced meat, tomato sauce and bechamel sauce. Typically the vegetables, be it potatoes or eggplants, are fried and then layered accordingly.
Saute onions for tomato sauce


This light and and dairy moussaka is not only vegetarian, but not as heavy and fattening as the classic Greek moussaka. I used eggplants for this casserole and instead of breading and frying it, I brushed it lightly with olive oil and then broiled it. I personally do not like fried eggplants,  because it tends to be a greasy with a pool of oil at the bottom of the dish.


To create the substance of meat in this vegetarian moussaka, I used feta cheese and cottage cheese which gives a rich and filling texture to the layers of eggplants.
Salt eggplant, pat dry, and then gill in broiler


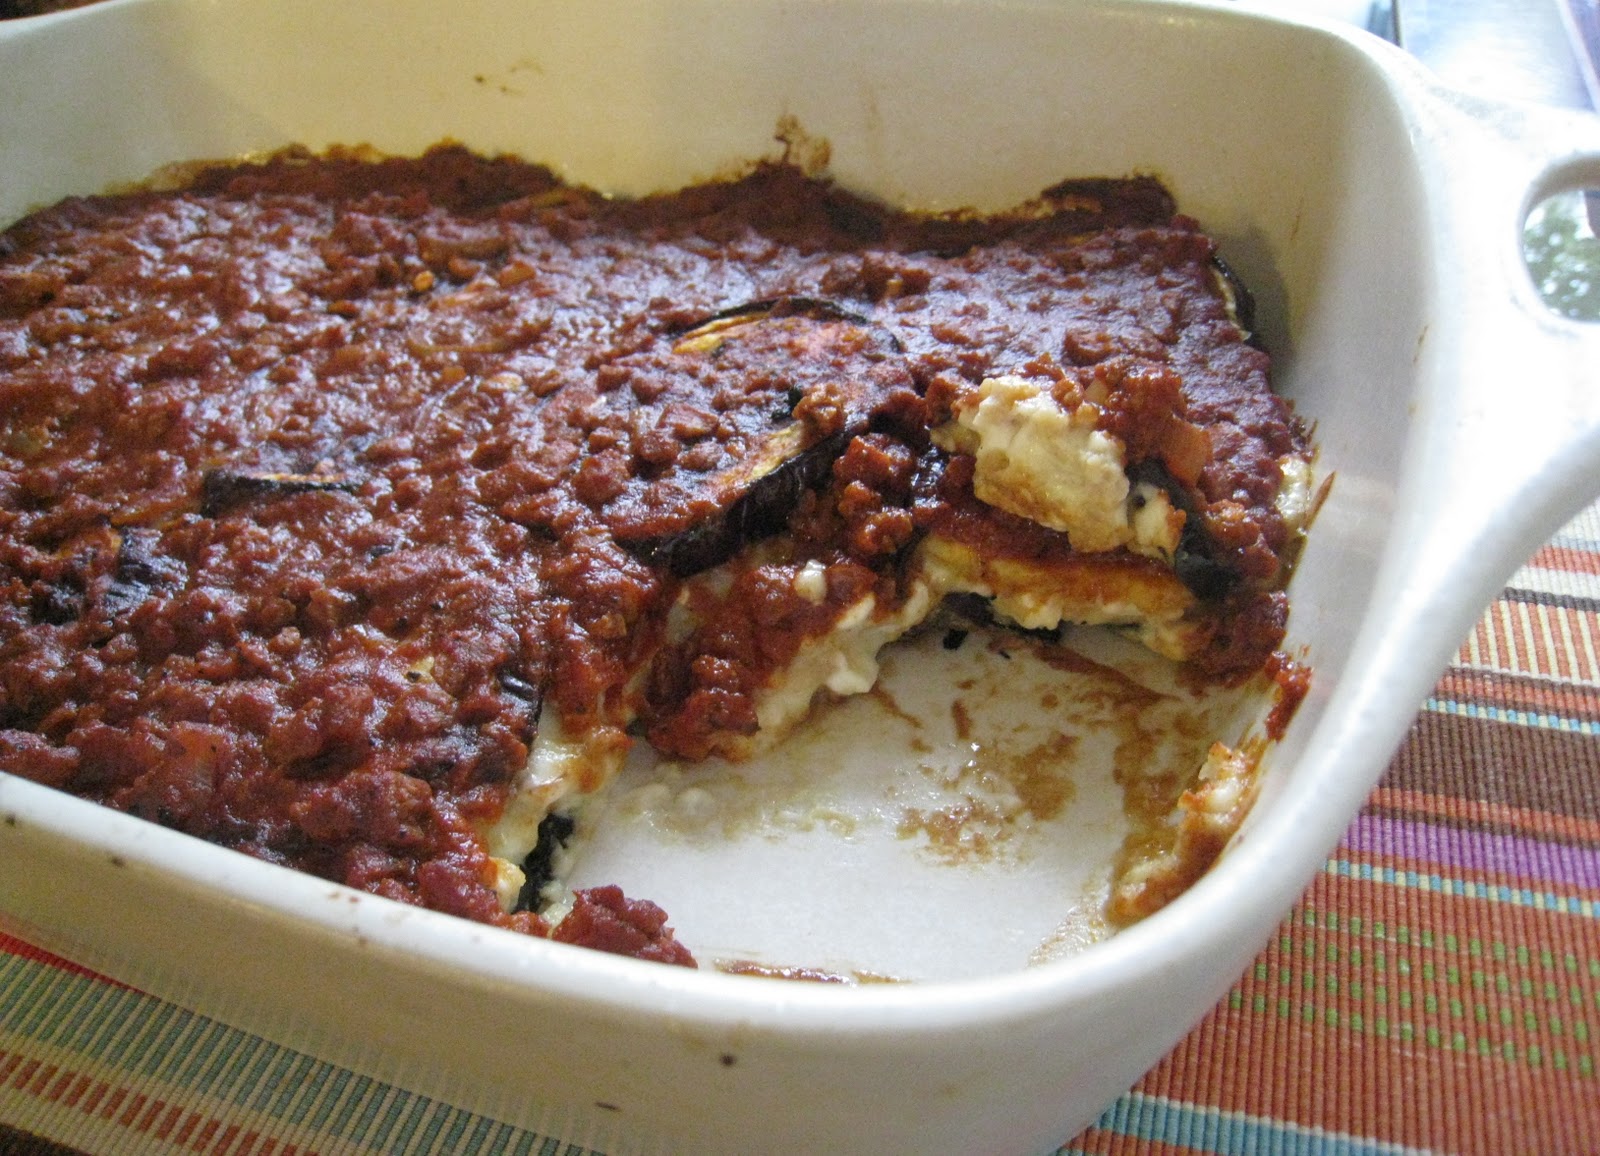
In the summer time, serve this dish straight from the oven dish with a fresh leafy salad for a satisfying meal on those long summer evenings. In cooler months, try serving it with homemade potato wedges cooked with chilli flakes and olive oil for a filling plate of comfort food.

Serves 8


INGREDIENTS

1 large eggplants, unpeeled and sliced into 1/4 inch rounds
1/2 teaspoon salt
olive oil, for basting
Cheese Filling
4 ounces cheddar cheese, shredded
8 ounces cottage cheese
3 ounces feta cheese, crumbled
2 eggs, beaten
1/3 cup Gluten Free cereal, crushed
2 garlic cloves, minced
1 teaspoon chopped parsley
Tomato Sauce
1 tablespoon olive oil
1 large onion, sliced
5 tomatoes, diced
1 1/4 cups water
2 tablespoons oil
1 teaspoon garlic powder
2–3 tablespoons sugar
1 teaspoon salt, scant
1/2 teaspoon pepper


Directions
  1. Sprinkle eggplant slices with salt and let stand ½ hour. Set your oven to broil. Pat dry with a paper towel, baste with olive oil on both sides. You can use a brush to baste. Lightly salt the eggplants and place on tray for the oven. Grill on both sides until golden, about 7 minutes on each side. Make sure the eggplants do not burn.
  2. To prepare filling: mix together cheddar cheese, cottage cheese, feta cheese, beaten egg, gluten free cereal, garlic, and parsley. 
  3. To prepare tomato sauce: sauté sliced onion in oil until tender. Add remaining ingredients for sauce and bring to boil. Simmer covered for 20 minutes or until tomatoes have emulsified.
  4. Put a layer of eggplant slices in a greased casserole dish. Place a tablespoonful of filling on each slice and cover with a second slice. Pour tomato sauce over eggplant slices. Cover with aluminum foil and bake at 350° for 15 minutes. Remove cover and bake another 20 minutes.

Monday, December 13, 2010

Broccoli and White Bean Salad with Chutney Dressing (Gluten Free)

A wholesome salad that is perfect as a starter or a light lunch. I love crunchy foods.... something about it is just satiating. This salad is just that, with the crispiness of the fresh broccoli and the crunchiness of the almonds. Pack that with smooth creamy white beans and the sweet spicy chutney and you will find yourself on a flying carpet to the Taj Mahal.


Serves 8


Ingredients
1 broccoli head, cut into florets
2/3 cup plain non fat yoghurt
1/4 cup mango chutney
1 teaspoon curry powder
1 (15 ounce) can of cannellini beans *
1/3 cup slivered almonds
8 large lettuce leaves (for garnish)


* If you don't have a can of cannellini beans soak 3/4 cup of dried beans in a large bowl of cold water overnight.  Drain.  Place the beans in a large sauce pan of water, bring to a boil, and cook for 20 minutes.  Drain.  Return the beans to the pan, cover with cold water, and bring to a boil again. Cook until the beans are tender, 1-2 hours.
  1. Place a steamer tray in a saucepan, pour about 2 inches of water into the pan, and bring to boil over medium high heat. Place the broccoli in the steamer tray, cover the pan and cook until barely fork tender (about 5 minutes). Transfer the broccoli to a colander, rinse with cold water and stop the cooking.
  2. Meanwhile, place the yoghurt in a small bowl and whisk in the chutney and curry powder. Set aside.
  3. Drain the beans in a colander and rinse. Pay them dry with a paper towel. Transfer the broccoli to a large bowl and add the beans and almonds. Pour in the yoghurt dressing and toss to combine. Season with salt.
To serve:
Line 8 salad bowls with a large lettuce leaf and mound the broccoli salad on top.

Monday, December 6, 2010

The Best Chocolate Cake Ever (Gluten Free)

This is not one of those multi layered frosted cakes... I don't have the patience to make a day of baking a cake. I know that when it comes to chocolate cake, many people would disagree with that since most of the fun in baking a chocolate cake is tasting and licking away the batter and frosting. That would send me into a serious sugar high. No, this cake is not a whole day affair, but the taste is like it came from a gourmet patisserie.


This chocolate cake, is a moist, chocolaty no fuss cake that is soft, fluffy and GLUTEN FREE. You could also make it vegan with an egg replacer, but I did use two eggs for this cake. You will have to refrigerate the batter for at least 30 minutes before baking to improve its texture.


When baked, you can store this cake in the fridge, as it keeps well, however I like to warm it up before I eat into it again. As a cold cake it takes on more of a truffle texture, warming it up brings it back to a moist and bouncy cake.


Adapted from Heidi Swanson's Basic Chocolate Cake recipe.


Ingredients

1 cup brown rice flour
         1 cup sorghum flour
         1/2 cup coconut flour 
3/4 cup non-alkaline cocoa powder (I use Trader Joes)
1 tablespoon baking powder (look for non-aluminum type)
3/4 teaspoon fine grain sea salt
1/2 cup barely melted vegan butter (Earth's Balance)
1 cup real maple syrup, room temperature
2 eggs, lightly beaten
2 teaspoons vanilla extract
1 cup coconut milk, room temperature
4 ounces good-quality bittersweet chocolate, shaved or finely chopped
  1. Grease an 8x8 square cake pan.
  2. Sift the flours, cocoa powder, baking powder, and salt into a large bowl. In a separate medium bowl whisk together the melted butter and maple syrup until it looks like caramel.
  3. Whisk in the eggs, vanilla, and then the coconut milk. Pour the maple syrup mixture over the flour mixture and stir until barely combined. 
  4. Add the chocolate and stir until everything comes together and is no longer dusty looking - avoid over-mixing.
  5. Refrigerate batter for up to 30 minutes, but no longer than 2 hours.
  6. Preheat oven to 325F degrees with a rack in the middle. Pour the batter into the prepared baking pan and bake in preheated oven for 30 - 40 minutes. 
  7. Remove from oven and allow to cool.

Monday, November 29, 2010

Ginger Pear Crumble (Vegan, Gluten Free)

I make this crumble most often once when the fruits of summer give way to apples and pears in the fall. Crumbles are easier to prepare and faster to bake than pies, crisps and cobblers and are the perfect showcase for seasonal fruits.


This dessert is the simplest of all: fresh pears are covered with a ginger snap topping and baked until the crust is crispy and the filling bubbles and thickens. Gingersnap cookie crumbs is the base for this sweet, nut-filled crumble that tops this pear crisp. I used Trader Joe's Gluten Free Ginger Snap cookies, however feel free to use any other brand of your choice. Serve with light cream or a scoop of vanilla yoghurt.


Serves 8


Ingredients


4 medium pears, pared, halved and cored
1/4 cup orange juice
1/2 cup finely crushed ginger snap cookies
2 tablespoons brown sugar
2 tablespoons chopped walnuts
2 tablespoons vegan butter, melted


Directions
  1. Preheat oven to 350F.
  2. Place pears, cut side up in a 9-inch pie pan. Drizzle orange juice over pears.
  3. In a medium bowl, combine ginger snaps, sugar, walnuts and butter. With your hands work it until it looks something like mortar.
  4. Pat ginger snap mixture over the pears. Bake in preheated oven for 20-25 minutes.

Sunday, November 21, 2010

Vegetarian Pepper Steak (Vegan, Gluten Free)


In China, during the Han Dynasty (about 600 B.C.E) mock meat was born to accommodate the foreigners that visited the Buddhist monasteries. Since respect for all life and abstaining from meat is apart of Buddhist philosophy, the Chinese developed a mock meat that approximates the aesthetic qualities, primarily texture, flavor, and appearance of meat to make their carnivorous guests feel at home.

Today, most mock meats you find in the supermarket are over processed and filled with chemicals and fillers. If you are not eating meat for health reasons, this alternative is not a very good one. That is why it's important to read the labels of any mock meat you buy and just like meat, should be eaten in moderation.


There is a brand of mock meat that I buy that I am very pleased with. It's from a company called May Wah found in China Town, NY. The ship all over the world if you can't find this brand in your local store. Or, you can do what I did and ask you local supermarket to carry it. I went to the local HMART and asked them if they would carry this brand and they were more than happy to carry this mock meat since many of their customers are Asian.

For this Pepper Steak, I used the chicken strips from May Wah called Vegetarian Pepper Steak.  It's ingredient list is:


  • Soybean Fiber
  • Soybean Protein
  • Soybean Sauce
  • Natural Seasoning

As you can read, it does not have anything in it I can't pronounce and don't recognize.
Stir Frying


This Chinese American dish is a variation of the traditional stir-fry, with slices of vegetarian beef strips marinated in soy sauce and rice vinegar. The best part of this dish is it’s cooked in onions, green scallions and ginger with a hint of salsa for a deeper intense flavor. This dish will be a great hit with your meat-eating guests, because it really tastes and feels like the “real” thing.  Serve on a large platter over plain rice or rice noodles.

Serves 4

Ingredients
1 (16 ounce) package of vegetarian beef strips
2 tablespoons vegetable oil
1 medium onion, thinly sliced
2 green onions (green parts only), chopped
4 garlic cloves, finely chopped
1 (1-inch) piece fresh ginger, finely chopped
 2 green bell peppers, thinly sliced
2 tablespoons salsa

Marinade

3 tablespoons soy sauce
1/4 cup water
1-teaspoon agave syrup
½ teaspoon red pepper flakes
2 tablespoons vegetable oil
2 tablespoons rice wine vinegar
1 teaspoon ground ginger

Directions:
      1      Whisk soy sauce, water, oil, rice vinegar, agave and ground ginger. In a medium size bowl, pour over beef strips and marinate for 10 minutes. Set aside.
      2      Heat oil in wok over high heat; sauté onion, green onions, garlic, and ginger for 5 minutes or until onions begin to turn clear.
      3      Stir in green pepper and cook for 5 minutes or until peppers become soft.
      4      Add the vegetarian beef with marinade and stir-fry for an additional 5 minutes.
      5      Stir in the salsa and cook for another 3 minutes blending all ingredients.

Sunday, November 14, 2010

Cauliflower and Leek Soup with Toasted Hazelnuts (Vegan, Gluten Free)

When I started foraging for dinner ingredients this afternoon, I found a few autumn vegetables for this soup.  Cooler weather always has me craving snuggly socks, a toasty blanket and a soup that just warms me up. The great thing about cauliflower, beside the lovely potato like taste and all the vitamins, is that the soup get a creamy thick consistence without using cream, or any other kind of thickener. By also adding lemon to the soup you get this fresh taste. Top with toasted hazelnuts and  you get that warm nutty crunch that makes this a hearty winters' soup. Purée in a blender for the smoothest, creamiest results. Make the soup up to a day ahead, and store in the refrigerator. Reheat over medium-low heat, stirring frequently.


Recipe courtesy of Chef Peter Berley, author of The Flexitarian Table


SERVINGS 8-10

INGREDIENTS

Sea salt
Freshly squeezed juice of 1 lemon
1-2 head of cauliflower (3 pounds in total), separated into florets
4 tablespoons extra-virgin olive oil
6 medium or 3 large leeks — tough green parts discarded, the remainder thinly sliced and thoroughly rinsed
1-2 quarts vegetable stock, preferably homemade
1/2 cup peeled hazelnuts, coarsely chopped
Freshly ground black pepper
Freshly grated nutmeg
Finely chopped fresh parsley

Directions

1. Bring a large pot of water to a boil. Add 2 tablespoons of salt and the lemon juice. Add the cauliflower and cook, uncovered, for 15 minutes. Drain the cauliflower and set aside.

2. Meanwhile, in a heavy soup pot over medium heat, warm the olive oil. Add the leeks and stir to coat, season with salt and cook until very tender, 8 to 10 minutes. Adjust the heat as needed to prevent browning. Add the cauliflower and stock and bring to a simmer. With a slotted spoon transfer the leeks and cauliflower to a blender or food processor and puree with some of the stock until smooth. Return the puree to the pot.

3. In a toaster oven, bake at 350F the hazelnuts for about 8 minutes or until fragrant.

4. Bring the soup to a simmer, season with salt, white pepper and nutmeg. Serve the soup garnished with the hazelnuts and parsley.

Monday, November 8, 2010

Roasted Squash with Sunflower Seed Dressing over Wild Rice

I need to have a good breakfast before I make this dish because I need all the power in my arms to hack away the skin off the squash. I use an 8 inch Wusthoff knife to slice away the the thick layer of skin that is protecting the sweetest moist orange flesh that is the star of this dish.

It is Fall and I love autumn produce. This giant dish is a seasonal favorite of mine. How do I describe this dish to you... there is so much going on here and it is one the best recipes out there for squash, thanks to Heidi Swanson's 101 cookbook vegetarian website. I have been following her vegetarian blog for sometime and am quite impressed with some of the dishes she has created. This is one of them.

This wild rice dish with roasted squash features two of my seasonal favorites; squash and tiny red onions.  Topped with a sunflower cilantro dressing and you have a healthy hearty and incredibly complex dish.  So many exciting flavors... sweet, salty, nutty, crunchy all in one that just creates a POW in your mouth and stomach.


Now you may not be able to tell from the picture, but the wild rice is under the squash. I did not want to mix it to much because I did not want to break apart the soft roasted squash. I also used Sweet Dumpling Squash which looks like a miniature pumpkin with a hint of orange skin. You can use any squash you have for this dish.


Serves 4

              Ingredients
3 cups Sweet Dumpling Squash (or other winter squash), peeled and cut into 1-inch cubes
extra-virgin olive oi
fine grain sea salt
12 tiny red onions or shallots, peeled (OR 3 medium red onions peeled and quartered)
2 cups cooked wild rice* 
              Dressing 
1/3 cup sunflower seeds
1/3 cup olive oil
2 tablespoons lemon juice
1/4 teaspoon salt
1 tablespoon sugar
2 tablespoons warm water
1/2 cup cilantro, finely chopped
Directions
  1. Preheat oven to 375F.
  2. Toss the squash in a generous splash of olive oil along with a couple pinches of salt, and layer onto a baking sheet. At the same time, toss the onions with a bit of olive oil, sprinkle with salt, and layer onto a separate baking sheet. Roast both for about 45 minutes, or until squash is brown and caramelized. The same goes for the onions, they should be deeply colored, caramelized, and soft throughout by the time they are done roasting. You'll need to flip both the squash and onion pieces once or twice along the way - so it's not just one side that is browning. This could take about 40 minutes. You should keep an eye on the onions because they will roast faster then the squash.
  3. In the meantime, make the dressing. With a food processor puree the sunflower seeds, olive oil, lemon juice, salt, and sugar until creamy. You may need to add a few tablespoons of warm water to thin the dressing a bit. Stir in the cilantro, saving just a bit to garnish the final plate later. Taste and adjust seasonings (or flavors) to your liking.
  4. In a large bowl, toss the wild rice with a large dollop of the dressing. Add the onions, gently toss just once or twice. Scoop the rice and onions out onto a platter and top with the roasted squash (Gently toss to disperse the squash a bit). Finish with another drizzle of dressing and any remaining chopped cilantro.

* To cook wild rice: Rinse 1 1/2 cups wild rice. In a medium sauce pan bring the rice and 4 1/2 cups salted water to a boil. Reduce to a simmer. Cook for 40 minutes or until rice is tender and splitting open, stirring occasionally. You'll have enough for this recipe and some leftover.

Monday, November 1, 2010

Curried Celery Soup (Vegan, Gluten Free)

How annoying is it when you are cooking up a dish from a recipe that calls for one or two celery stalks and you are still left with a bunch of celery?  How many times has celery just sat in your fridge begging to be used to no avail?? A celery here... a celery there.... still it just does not get used up and this is because, most of the time celery is used as a root in a recipe and does not really enhance the flavor to the dish.

Finally a soup that uses 1 1/2 pounds of celery!! That's right.... now you get to use up that glut sitting in the fridge for an Indian spiced soup that will beckon you to make this soup over and over again.

While I agree that celery may not have a lot of taste, when combined with potatoes, onions and curry, celery morphs into an exotic blend that is perfect for a winter warmup.


Serves 4-6

Ingredients

2 teaspoon olive oil
1 onion, chopped
1 leek, washed and sliced
1 1/2 pounds celery, chopped
1 tablespoon curry powder
2 potatoes, washed, peeled and diced
3 3/4 cups vegetable stock
1 bouquet garni (parsley, thyme and bay leaf tied together)
2 tablespoons fresh parsley, finely chopped

Directions
  1. Heat oil in a large saucepan. Add the onion, leek and celery. Cover and cook gently for about 10 minutes, stirring occasionally.
  2. Add the curry powder and cook for 2 minutes more, stirring the vegetables occasionally.
  3. Add the potatoes, stock and bouquet garni and bring to a boil. Simmer for 20 minutes, until the vegetables are tender.
  4. Remove and discard the bouquet garni and set the soup aside to cool lightly.
  5. Use a hand blender and process in pot until smooth.
  6. Add the fresh parsley, season to taste and ladle into soup bowls. Garnish with some celery leaves.

Tuesday, October 26, 2010

Vegetarian Mustard Collard Greens (Vegan, Gluten Free)

A staple vegetable in Southern cuisine that is typically cooked with smoked ham or salted meats. Somehow the South took this thick leafy vegetable that is rich in vitamin C and turned it into a fatty meat vegetable side dish.


So when I received this thick slightly bitter green vegetable, I wandered what to do with it other than saute it in olive oil and garlic (which is usually what I do when I can't be bothered to be creative with a vegetable... it's the easiest thing to prepare and always comes out right).


This time I thought, I want to recreate this Southern staple into a Northeastern Vegan dish while retaining that smoked flavor with some cider vinegar and onions which mimics the smokiness that so many Southerners are used to.


The end result was a deep chipotle flavored green side dish resembling the Southern staple in flavor, somewhat, only healthier and I think just as distinctive. I served this with grilled veggie burgers and some sauteed red peppers for added sweetness.


Serves 6-8


Ingredients


    • 1 lb collard greens ( or 1/2 collards, 1/2 kale)
    • 1 onions, chopped
    • 1/2 cup prepared salsa or 1 chopped tomatoes
    • 2 -4 cloves garlic, chopped
    • 2 tablespoons cider vinegar
    • Salt to taste
    • hot sauce, to taste

Directions


  1. Wash greens in a colander.
  2. Chop into bite-sized pieces and remove hard stems.
  3. Saute onions and garlic, making sure not to burn. Once onions are clear, throw in all remaining ingredients into a large pot, cover and reduce heat.
  4. Greens are done when they have shrunk down and are cooked through, usually about 20 minutes, but you can let it simmer much longer.
  5. Serve with its liquid.


Sunday, October 17, 2010

Sweet and Sour Veggieballs (Gluten Free)

This past Rosh Hashana I was inspired to make sweet and sour meatballs, probably due to the fact that every where I turned to in the kosher supermarkets was advertised a catered meal with sweet and sour meatballs. I never see them advertised at other times of the year, just at holidays. Somehow Sweet and Sour meatballs has become a staple in Ashkenasi families, "Just like Bubeh made them!" Not my Bubeh, since I am a Sephardi Jew, but certainly like my husbands' whose grandparents were from Lithuania. I suppose it draws some nostalgia to the old country for some... however for me, since my husband and I are vegetarians I decided to contemporize (not sure of that's a real word, but you get my drift) the classic dish with veggie balls.

When I think of meatballs, I think of tomato sauce and bay leaf. Basil. Pasta. Italian. But the liking for a subtle blend of sour and sweet is an Ashkenazic taste that displays itself in other traditional recipes: beet borsht, brisket cooked with dried fruit, honey and vinegar, and of course that perennial Jewish favorite, Chinese food.


So I made them. These veggieballs are made from mushrooms, have no gluten in them and by far is one of the healthiest mock meat out there. All the ingredients are recognizable and pronounceable. You can find them in the refrigerated section on you can request for your supermarket to carry it here.

The meatbals turned out very good indeed, firm but tender, savory/sweet. A nice little mouthfull to keep everyone interested and no one could believe that it was not MEAT. I was so excited that I was able to prepare a dish for my meat eating crowd and show them that a life without meat is absolutely doable and better for us all. With the upcoming Thanksgiving holiday approaching, where cranberries are traditionally eaten, this dish fits right in once again for a festive meal. Look how quick and easy it is to prepare. Serve on a large platter with a side of sweet potatoes or noodles.


Ingredients

3 cups tomato sauce
1 (15 ounce) can of cranberry sauce
2 onion soup bouillon (vegan)
1 cup sour kraut
2 packages Veggieballs from Franklin Farms

Directions

  1. Combine tomato sauce and cranberry sauce in a large stockpot over medium high heat.
  2. Once simmering add the soup bouillon and break apart with a spoon to blend with the sauce. When bouillon has emulsified into sauce, add sour kraut and bring to simmer.
  3. Add veggie balls, lower heat and simmer covered for 15-20 minutes or until heated throughout.


Monday, October 11, 2010

Baked Spaghetti Squash with Parmesan (Gluten Free)

Does anyone remember a commercial that Ronzoni had over 25 years ago of Italian woman carefully selecting spaghetti strands from trees? That commercial left such an impression on me when I was a child that I actually thought spaghetti grows on trees! Stop laughing at my naivete.... you thought so too, no?

Apparently that commercial was a spook that the BBC played in 1952 on April Fools Day about the spaghetti crops in Switzerland.


The program feature a family from Ticino in Switzerland carrying out their annual spaghetti harvest. It showed women carefully plucking strands of spaghetti from a tree and laying them in the sun to dry.

Although some viewers did not find this program too amusing as it was intended to be, others were so intrigued they wanted to find out where they could purchase their very own spaghetti bush. So, I was not alone in this. I too wanted to know how to buy a spaghetti bush.

Well, as it turns out... we really don't have spaghetti bushes, but we do have Spaghetti Squash. It is an oblong seed-bearing variety of winter squash. The fruit can range either from ivory to yellow or orange in color or green with white streaks. Its center contains many large seeds. Its flesh is bright yellow, and orange or white for the latter variety. When raw, the flesh is solid and similar to other raw squash; when cooked, the flesh falls away into strands like spaghetti. The taste is quite bland and like spaghetti needs a really good sauce to enhance the flavor.


This main dish is like eating a spaghetti con pesto, minus the carbs. The strands are delicately tossed with herbs and then topped with parmesan cheese.

Serves 2

Ingredients

1 medium spaghetti squash
1 stick vegan butter
3 tablespoons mixed herbs, such as parsley, chives and oregano (chopped)
1 garlic clove, crushed
1 shallot, chopped
1 teaspoon lemon juice
1/2 cup parmesan cheese, freshly grated
Salt and ground pepper to taste

Directions

  1. Preheat oven to 350 F. Cut the squash in half lengthwise. Place the halves cut side down, in a roasting pan. Pour a little water around them and bake for 40 minutes or until tender. Do not allow to burn- cover with foil if necessary.
  2. Meanwhile, put the butter, herbs, garlic, shallot and lemon juice in a food processor and proces until smooth and creamy. Season with salt and pepper.
  3. When the squash is tender, scrape out any seeds, and place a thin slice from the base of each half so that it can sit level.
  4. Using a fork, pull out a few of the spaghetti like strands in the center to make room for filling. A a dollop of herb butter, then sprinkle with a little grate cheese. Serve the remaining herbed butter separately adding more as you pull more strands.


Monday, October 4, 2010

Vegetarian Chili (Vegan, Gluten Free)


Originally known as chili con carne which is taken from the Spanish, meaning "peppers with meat." Traditional versions are made, minimally, from chili peppers, garlic, onions, and cumin, along with chopped or ground beef. Beans and tomatoes have become frequent additions to this classic Tex- Mex dish. In fact, Chili con carne is the official dish of the U.S. state of Texas due to bordering Mexico which has influenced the Southwest significantly in regards to cuisine.

Tomatoes were not part of the original recipe and not everyone uses it in their dish, but since I have received over 20 pounds of tomatoes in the last month.... why not?? Plus my version is a stovetop vegetarian chili with a medley of assorted vegetables. I adapted this recipe and tweaked it several times until it has come out just perfect with the blend of just the right amount of spice, sweetness and the balance of vegetables to beans.

So Break out your soup pot and fix up a batch of this delicious, spicy vegetarian chili today. It's ready in no time, and packed with vegetables, beans - and flavor. This chili is SO easy to make and you can empty out the fridge with the glutton of veggies on the verge of turning. A colorful, satisfying bowl of chili that packs plenty of flavor — even for the most dedicated meat eaters will be satisfied due to the high protein from the beans. This yields a lot which is great because chili tastes even better when refrigerated overnight to seal in the flavor. Serve with corn bread, tacos or or over your favorite rice. Serve into a large platter, garnish with cilantro and adorn with sliced avocados.


Ingredients
  • 1 tablespoon olive oil
  • 2 medium onion, chopped
  • 2 bay leaves
  • 1 tablespoon ground cumin
  • 1 tablespoon dried oregano
  • 1 tablespoon salt
  • 1 teaspoon ground coriander
  • 3 medium sweet potatoes, peeled and cut into 1 1/2 inch cubes
  • 6 carrots, peeled and cubed
  • 2 stalks celery, chopped
  • 2 green bell peppers, chopped
  • 2 tablespoons chili powder
  • 1 jalapeno pepper, chopped
  • 3 cloves garlic, chopped
  • 6 tomatoes, coarsely chopped or 1 (28 ounce) can crushed tomatoes
  • 1 teaspoon sugar
  • 2 (15 ounce) can black beans, rinsed and drained
  • 1 cup water
  • 1/4 cup chopped cilantro, for garnish


Serves 6

Directions

  1. Heat the olive oil in a large pot over medium heat. Stir in the onion, and season with bay leaves, cumin, oregano, salt and coriander. Cook and stir until onion is tender, then mix in the sweet potatoes, carrots, celery, green bell peppers, jalapeno peppers, and garlic. When vegetables are heated through, reduce heat to low, cover pot, and simmer 5 minutes.
  2. Mix the tomatoes into the pot with sugar and stir in the black beans.  Add the water, and bring to a boil, reduce heat to low, and simmer 45 minutes.
Related Posts Plugin for WordPress, Blogger...